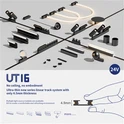
1. Determine the installation position. According to the type of magnetic lamp and installation needs, choose the appropriate installation location, such as the floor, wall or ceiling.
2. Prepare tools and materials. Tools and materials such as an electric drill, screwdrivers, expansion screws, suction cups, screws, decorative sheets, and power cables are available.
3. Fix the track. Use an electric drill to drill holes in the installation location, and then use screws to secure the track to the wall or ceiling.
4. Install the magnetic lamp holder. Insert the magnetic cap into the slot in the track and gently press down to ensure that the cap is tightly attached to the track.
5. Adjust the position and Angle of lamp holder. Adjust the position and Angle of the lamp holder as needed to ensure the best lighting effect.
6. Install light bulbs. According to the type of magnetic cap, select the appropriate bulb and insert it into the cap.
7. Connect the power supply. Connect the power cord of the lamp head with the power cord. Usually, the power cord of the lamp head will have two, one is the fire wire and one is the neutral wire.
8. Connect the live wire to the live wire and the neutral wire to the neutral wire. If there is a ground cable, connect it to the ground cable.
9. Install lampshade. Install lampshades as needed to protect the bulb and adjust the brightness and direction of the light.
10. Seal drywall and paint. When installing magnetic track lights, it is necessary to design the length and installation position of the required track before the woodworking ceiling, so as to facilitate woodworking construction and reserve power. After the track is fixed, be sure to light the test, and then proceed to the next step, such as sealing gypsum board and painting.

It should be noted that when installing the magnetic lamp, the power should be turned off to avoid electric shock. When installing the magnetic lamp, pay attention to find the horizontal line to avoid the lamp installation skew. During daily use, avoid frequent disassembly to avoid damaging the suction cup of the lamp.


